After finally finishing my series on netbooting Raspberry Pis, the initial trigger for creating this blog, I want to give an overview of what my current Homelab is looking like.
In this article, I will provide an overview of the hardware and hosts that I currently have. The next one will be about the stack I’m using, with a bit more detail on my storage solution, Ceph, and my cluster running Nomad, Consul and Vault. The final article will then be an overview of the services I’m running on the cluster.
I’m also planning a nice trip down memory lane, looking back at the past 12 years of homelabbing and describing all of the changes my setup saw, with my reasons for the changes I made (where I can actually remember them 😉).
I have been running local services of some kind since about 2012. But my renewed interest in self-hosting and my Homelab came in the autumn of 2020. I had just switched my Internet connection from 50 MBit/s to 250 MBit/s. This also meant a change of connection type, from ADSL to VDSL2. What I did not know at the time: My Fritz!Box, a consumer grade DSL modem/switch/WiFi AP/DECT base station combo unit did not actually speak VDSL2. Luckily for me, the connection still worked, but only with 100 MBit/s peak data rate.
So I needed a new DSL modem. But that was the only thing I really needed. The router, switch, WiFi AP, DECT base station were all fine and the Fritz!Box firmware was also okay and provided a nice set of options. But I would still need to replace the entire unit, just because the modem did not speak the new DSL wire protocol.
That’s another 200 bucks for a new Fritz!Box supporting VDSL2. Don’t get me wrong, I ended up investing way more into what I have now than that. It was more the principal of “Your DSL modem is out of date, you also have to replace your perfectly fine WiFi AP etc”. That annoyed me. Because that doesn’t just mean a new device, but also a fresh setup of said new device. It just seemed unnecessary to me, and so I embarked on the task of getting separate physical machines for each of these tasks. And because I wanted to monitor all of them, I introduced a Prometheus/Grafana stack. And the rest, as they say, is history. 😉
Networking and infrastructure
Let’s start with the networking infrastructure. In short: It’s a mess. 😅 When imagining my Homelab, do not imagine any sort of cable routing, let alone proper cable management. I believe the only “cable management” I ever did was to start buying very short network cables, for those times where a host is right next to the switch.
There’s also no rack to be found anywhere. While I’ve got some 64 square meters in my place, most of it is either my living room or my bedroom. And in neither would I want to place a rack. It is far more convenient to place some small hosts in a corner somewhere.
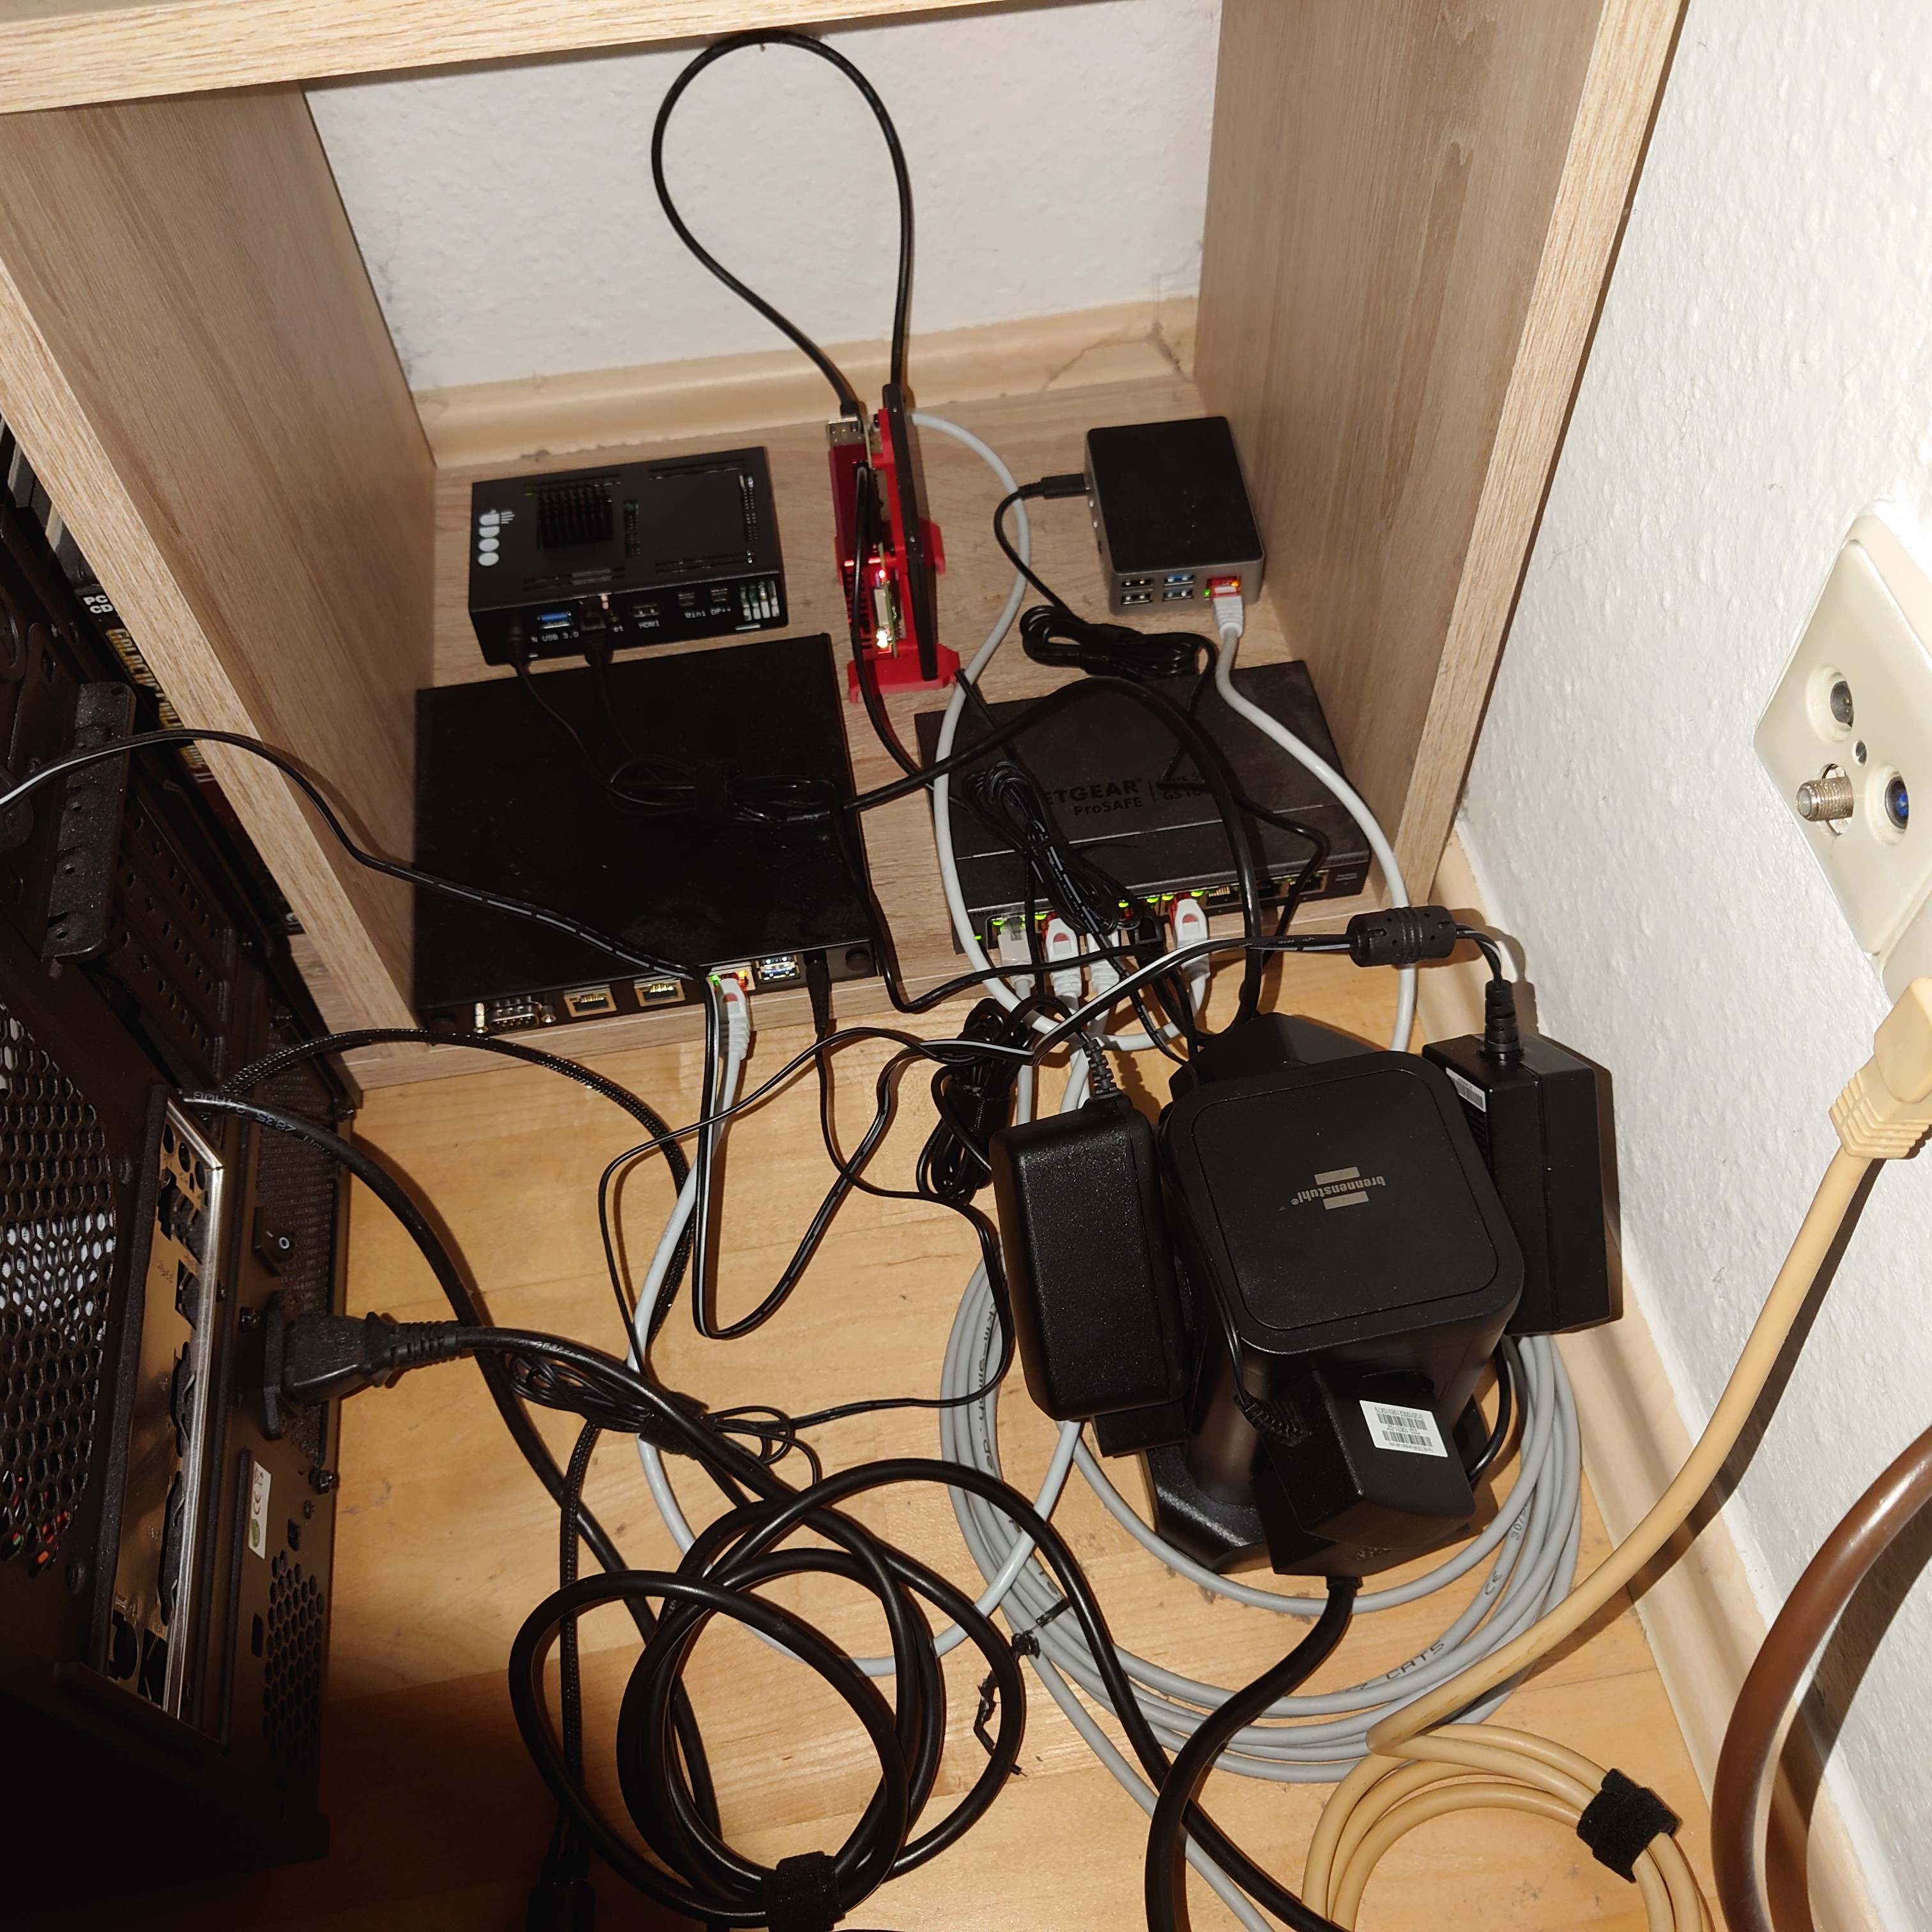
This is about half of my Homelab. It’s a couple of Raspberry Pis and an Udoo connected to a Netgear GS108E, 1G switch. I will discuss the hosts in the next section, for now let’s continue with the main networking appliances:
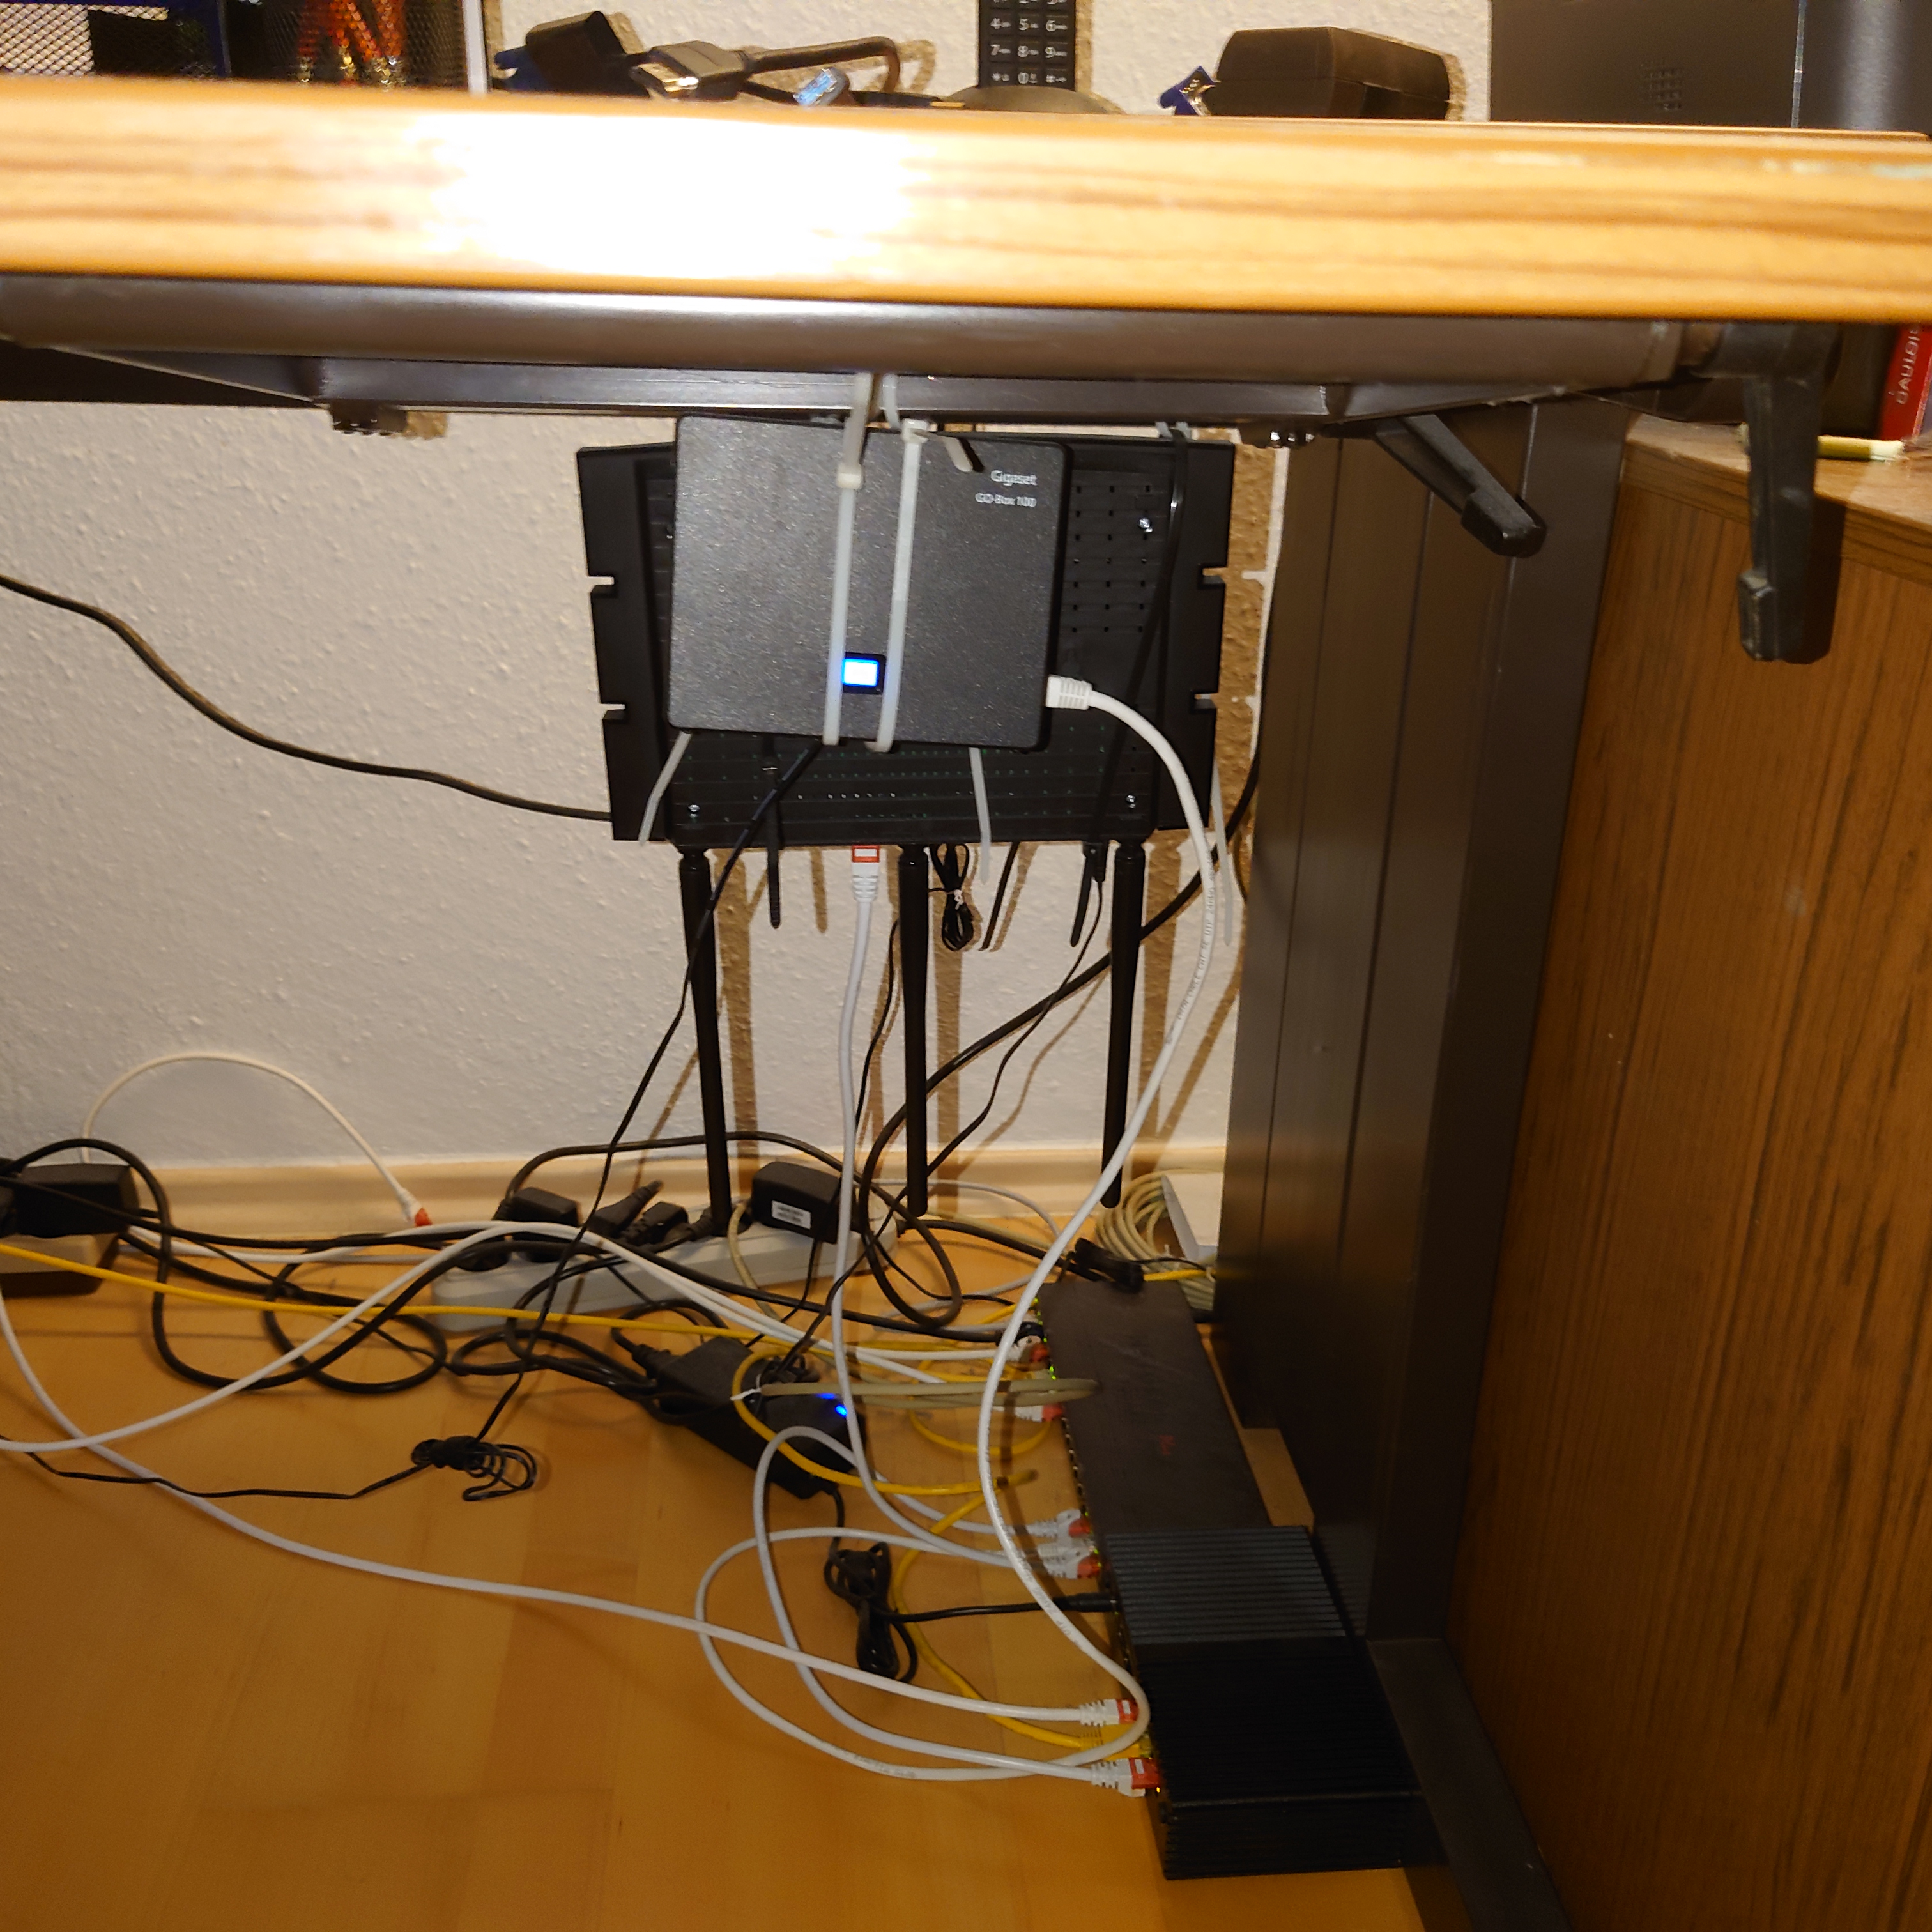
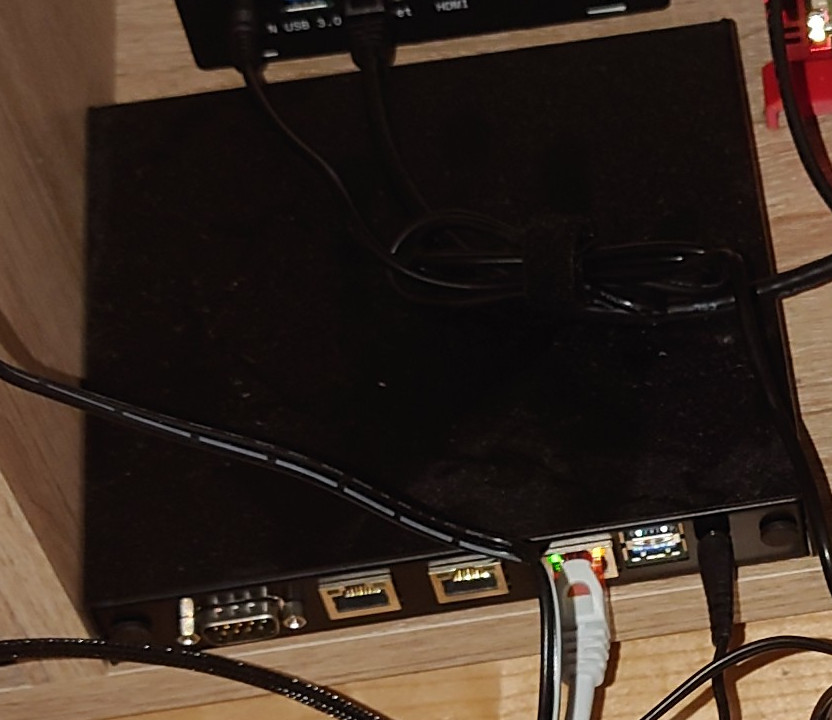
Here is the main networking part of my Homelab. It contains multiple parts separating the firewall, VDSL modem, WiFi AP and DECT base station.
The center piece here is another switch, the GS116E with 16 1G ports. It connects the main networking hosts as well as my main desktop machine and has a connection to the previously mentioned 8 port switch in my Homelab cupboard.
Next comes the firewall machine. It is a passively cooled NRG Systems IPU672. This is a passively cooled Intel i5-7200U laptop part, but it has plenty enough power to run my firewall. It has 6 networking ports and a serial console connection. Initially, I wanted to run my firewall on a PC Engines APU2E4, which comes highly praised by the router community. But I figured pretty quickly that, while the machine was plenty quick, it was not actually quick enough. At the time, I had just switched to a 250 MBit/s connection, and the APU2 was not able to do full speed with traffic shaping enabled. As far as I know, that was because the FreeBSD based OPNsense system has bad networking drivers that need high single core performance because any packet stream can only ever be handled by a single core, never split over multiple cores. But with the new IPU672, I’m now pretty confident that I will not have any problems even when 1GBit fiber finally arrives in my borough.
As already said, the machine uses the OPNsense firewall
distribution. The fact that it was based on FreeBSD and not Linux was pretty
interesting to me, as I did not have any previous experience with BSD. Besides
serving as my Firewall, it is also my router to the rest of the Internet. It
also hosts an Unbound DNS
server instance. This instance is fed any new DHCP address handed out and it
forwards to a PowerDNS DNS server which
is the authoritative server for all URLs which are not direct host names in
my Homelab. Furthermore, the firewall runs a DynDNS client to update my domain
when my ISP provided public IP changes.
It also hosts a WireGuard server for external connections into my Homelab.
My internal domain for hosts is .home, as mentioned partially in RFC8375.
This is also the search domain configured via DHCP for all local hosts.
The firewall also serves to create my
external connection to the rest of the world, by managing the PPPoE connection
to my provider.
This connection is directly tied to the next machine, a DrayTek Vigor 165. This is a VDSL modem/router combination machine. I’ve currently got a 250 MBit/s line from Deutsche Telekom, paying about 50 bucks for it. In reality, most of the time, I’m getting 300 MBit/s, which is pretty nice. Safe for a short stretch in February 2020, the connection has been very stable for me. The modem is running in bridge mode. This means that it only makes the Layer 1 connection to the line card in the DSLAM, but it does not actually connect me to DT’s infrastructure and gets me an external IP. That PPPoE connection is handled by my firewall host.
The next piece of networking hardware is a TP Link Archer C7 serving as my WiFi access point. Instead of the stock firmware, I’m using OpenWRT. That was pretty much the main reason for choosing the TP Link Archer: It was fully supported by OpenWRT and wasn’t too expensive.
And the final network device: A Gigaset Go-Box 100 (Sorry, in German only). This little box is a DECT base station for connection of wireless phones (not smartphones 😉). Landline phones are still sometimes used in Germany, and I use it from time to time to call my family. Plus, mobile reception isn’t too good in my flat. This was actually the most complicated part to figure out when I revamped my networking setup. There are a lot of possibilities if you would like to have some combined device for DECT telephony, with a switch and DSL router. But this one was the only thing I was able to find which allows VoIP via ethernet cable and only does DECT, nothing else.
Power delivery
Short aside on power delivery: I’ve got a grand total of three wall sockets available under/near my desk. And I must admit that I don’t like that fact, as I’m reasonably sure that they’re all connected to a single circuit and breaker. I’ve never had any problems at all with power overload, and I’m currently in the process of moving to lower power draw machines - but still.
Quite beside the “Does the circuit actually support this?” question, there is also the problem of power strips. Currently, there are three power strips, one in each of the wall sockets. But I’ve got a lot of machines which have their power supply as part of the plug, and not internal to the device. This means that I’m not able to use all available sockets on my power strips. So what did I have to do? I chained power strips, of course. Again, due to the mostly low power nature of my hosts, that isn’t a problem - but it also isn’t exactly best practice. And with newer gaming PCs going up to >1000 W in consumption, having multiple things plugged into a 2000 W power strip might not be possible very soon.
I was hoping to solve the space problem at least by buying a socket tower instead of a strip, in the hopes that large power plugs only block a single other socket, instead of two. That also did not really work out, but at least I’m now having enough sockets for all currently planned expansions.
Hosts
So besides the networking equipment, what else is there?
Let’s start with the one machine which doesn’t have anything to do with the Homelab: My daily driver desktop. This is an AMD 3900X 12c/24t part. It’s sitting alongside an AMD Radeon RX580. Luckily for me, my “Steam list of shame” is so long that it’s still going to be a while until that RX580 can’t handle the games I want to play. 😉 The machine is running Gentoo Linux. Why? Because that was my first Linux distro back in 2007, mostly. It has never once disappointed me in over 15 years as my main driver. Also, it is a very nice justification for always buying the newest CPUs with the most cores. 😅
And here is the current centerpiece of my Homelab:
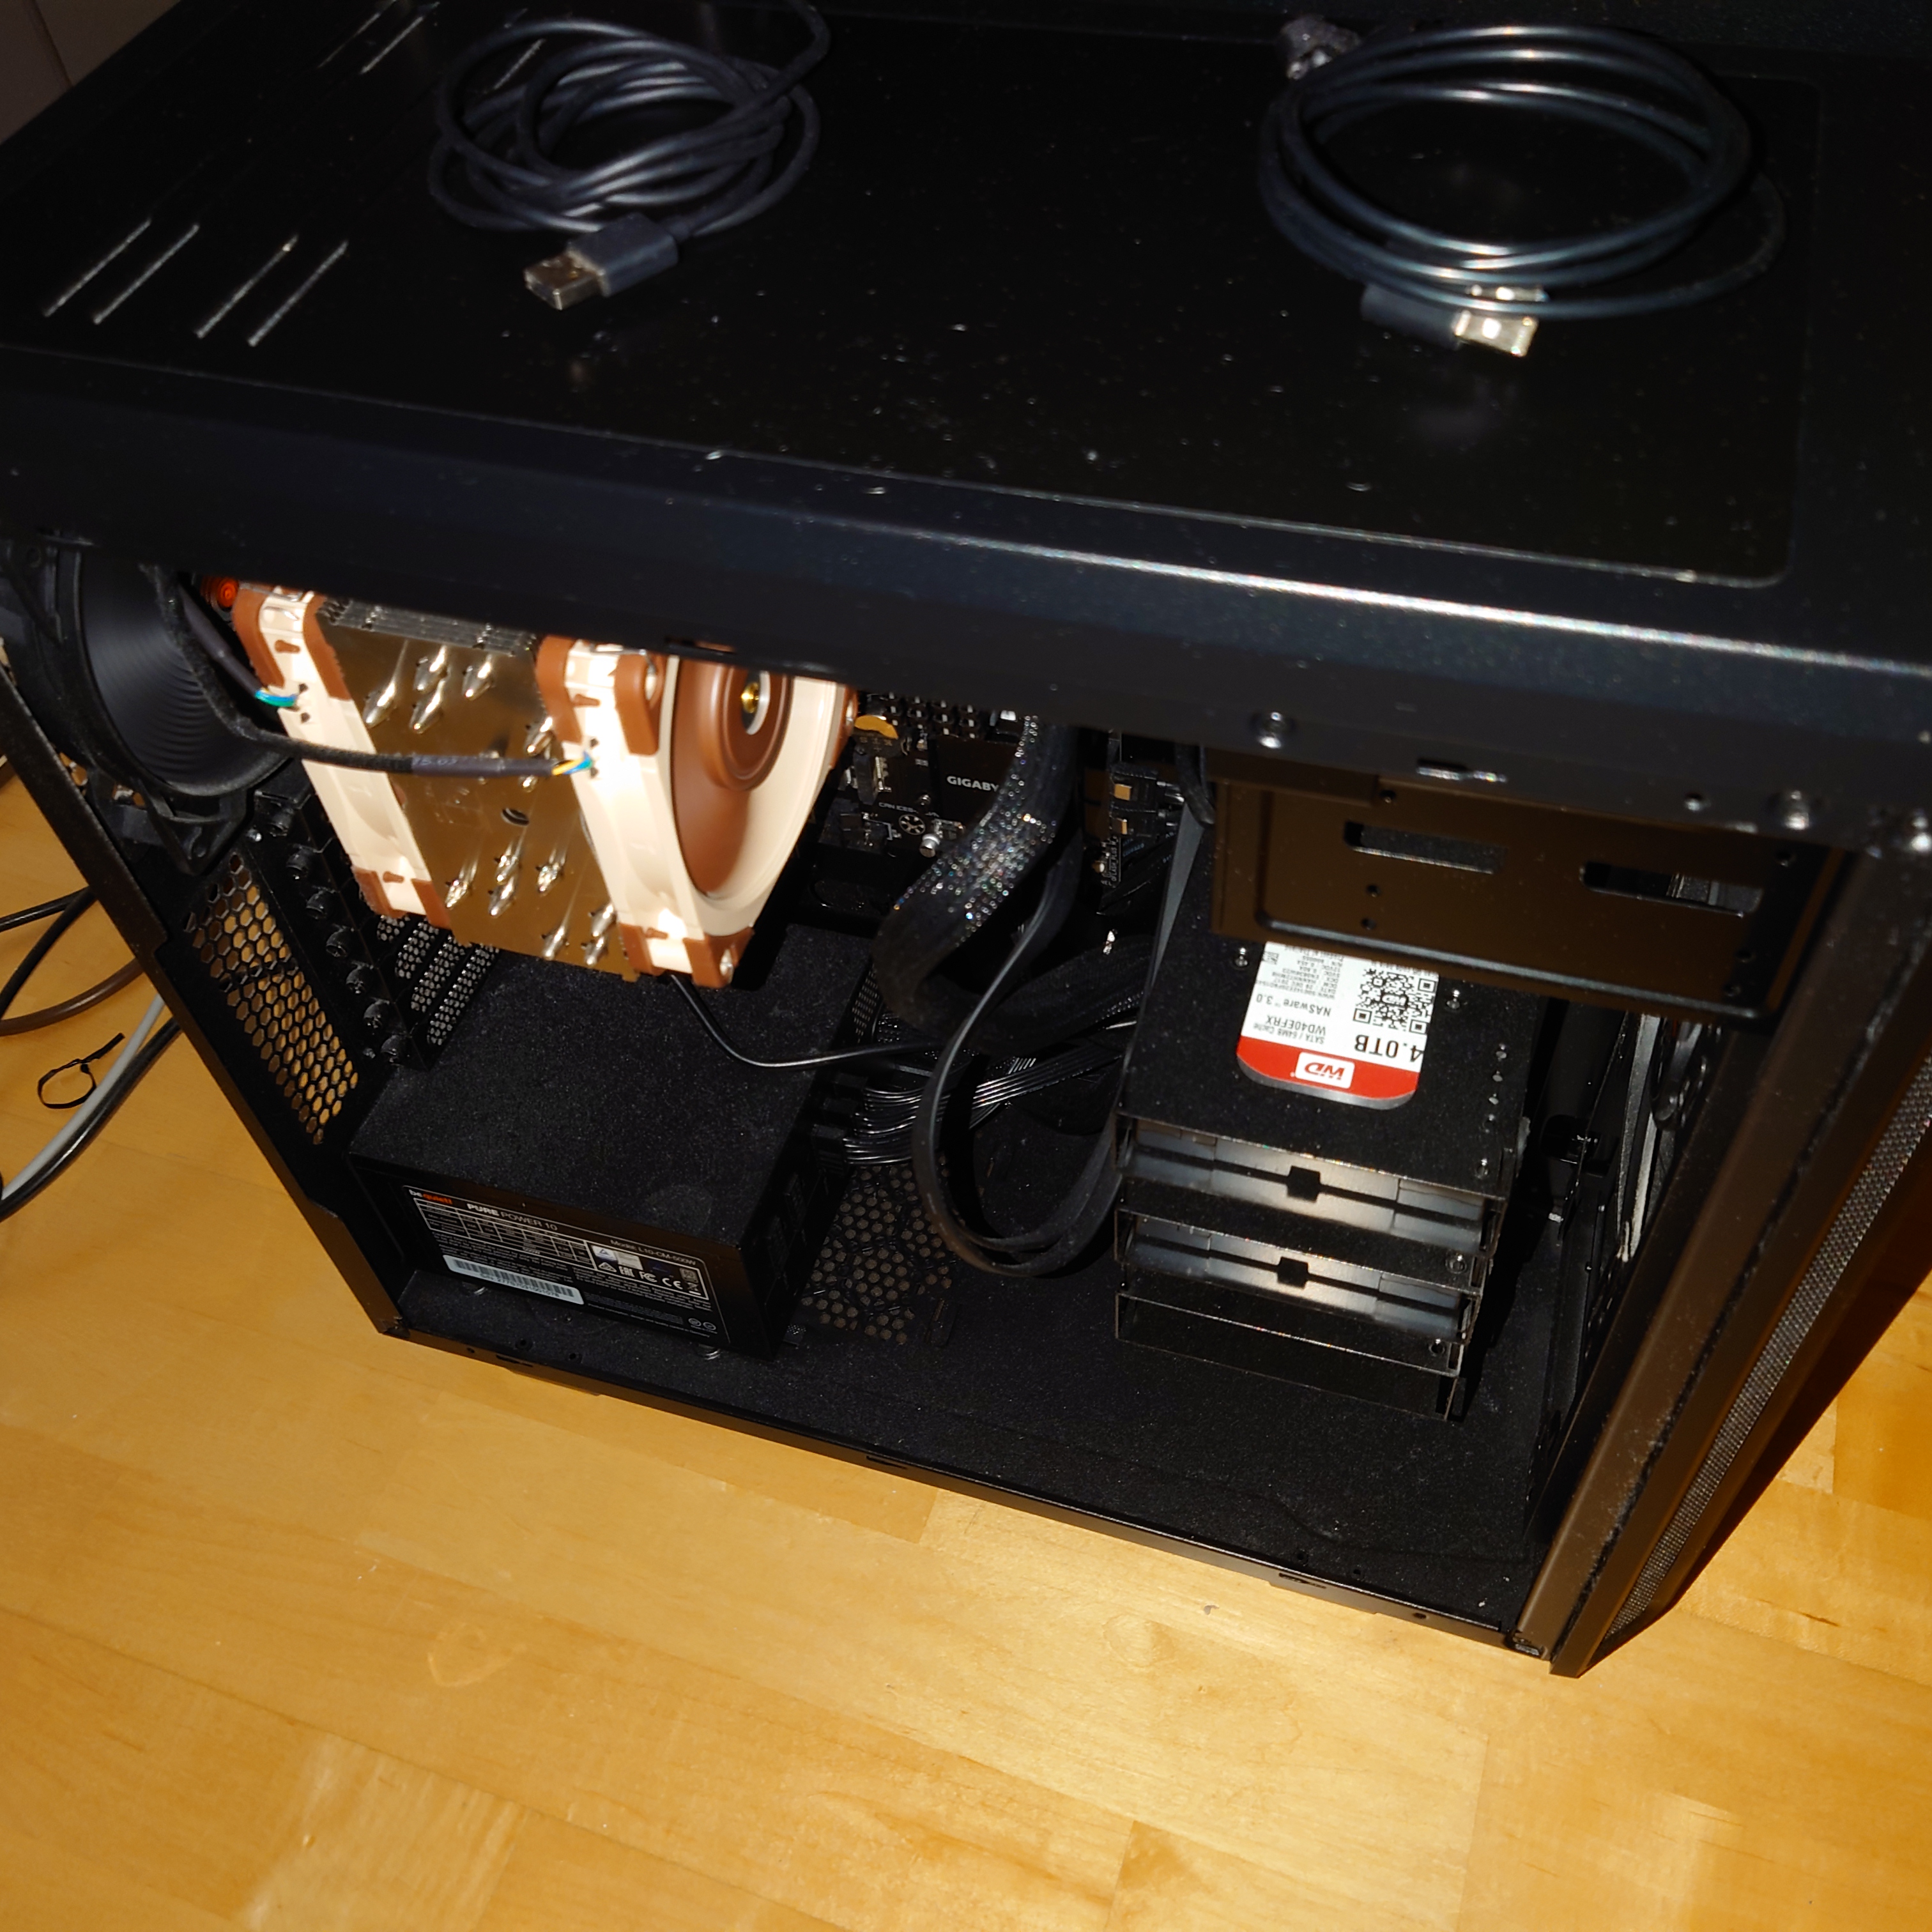
This is my main server, an Intel Core i7 10700 @2.90 GHz with 8c/16t. It has 94 GB of RAM and a lot of storage:
- 2x WD Red 4 TB, general Homelab storage in Ceph
- 2x Samsung SSD 860 Pro for the host’s root disk
- 2x Samsung SSD 860 EVO 1TB in Ceph cluster mostly used for VM’s/netbooted host’s root disks
It currently runs Arch Linux. That’s also mostly because Arch Linux has been my server distro for years now. But it is bad at it. A server OS needs stability, and Arch has not been able to deliver that for ages. Each update breaks either Ceph, LXD or Qemu. Considering that that’s the only three things running on it, that’s an extremely poor showing. The only reason it’s still there is that I’m going to switch to a cluster of Pis soonish and don’t want to redo everything.
So from my PoV: Avoid Arch Linux like the plague. The only good thing about it is it’s wiki.
As said above, the server does not run very much anymore, only LXD for virtual machines. There are two types of VMs running on the host: One, a couple of Ceph VMs using the two WD Red and the Samsung EVO SSDs for a storage cluster. This is one more problem with my current setup: Yes, I have different VMs for the different Ceph hosts - but they’re still in the same physical host. So when I have to reboot the machine (all the time with Arch), I have to shut down everything. More on that later. These Ceph VMs cannot, of course, use Ceph RBDs for their root disks, as their task is in providing Ceph RBDs to other machines. Their root disks are in a local LXD storage pool. The second class of VMs are service VMs, which are running parts of my Nomad cluster. All of these machines are getting their root disk storage from the Ceph cluster as Ceph RBDs.
That’s the problem with my setup: When this one physical host shuts down, my storage cluster, and with it most of my hosts, VM as well as physical, are gone. This also means that during upgrades (regular occurrence with Arch), I have to shut down everything else. First, the physical hosts netbooting with Ceph RBD volumes. Then the VMs booting from Ceph RBD volumes. And only then can I update the main machine. This is why that large physical host is soon going to be replaced by a whole cluster of Raspberry Pis, both for the Ceph cluster as well as the Nomad cluster.
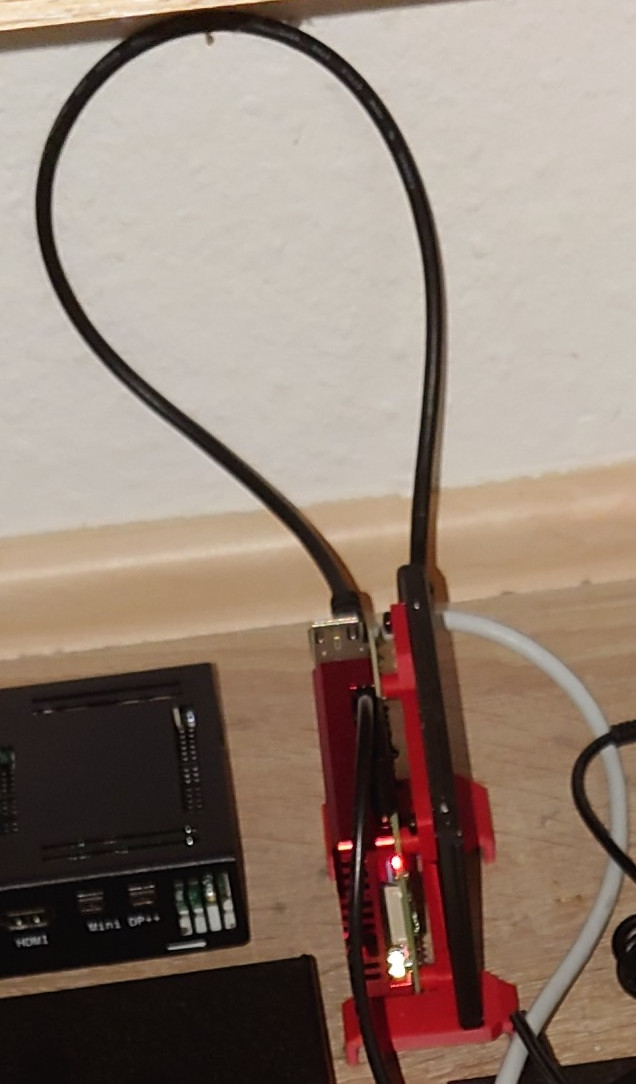
And this is a perfect transition to the next machine, the experimental Ceph Pi setup.
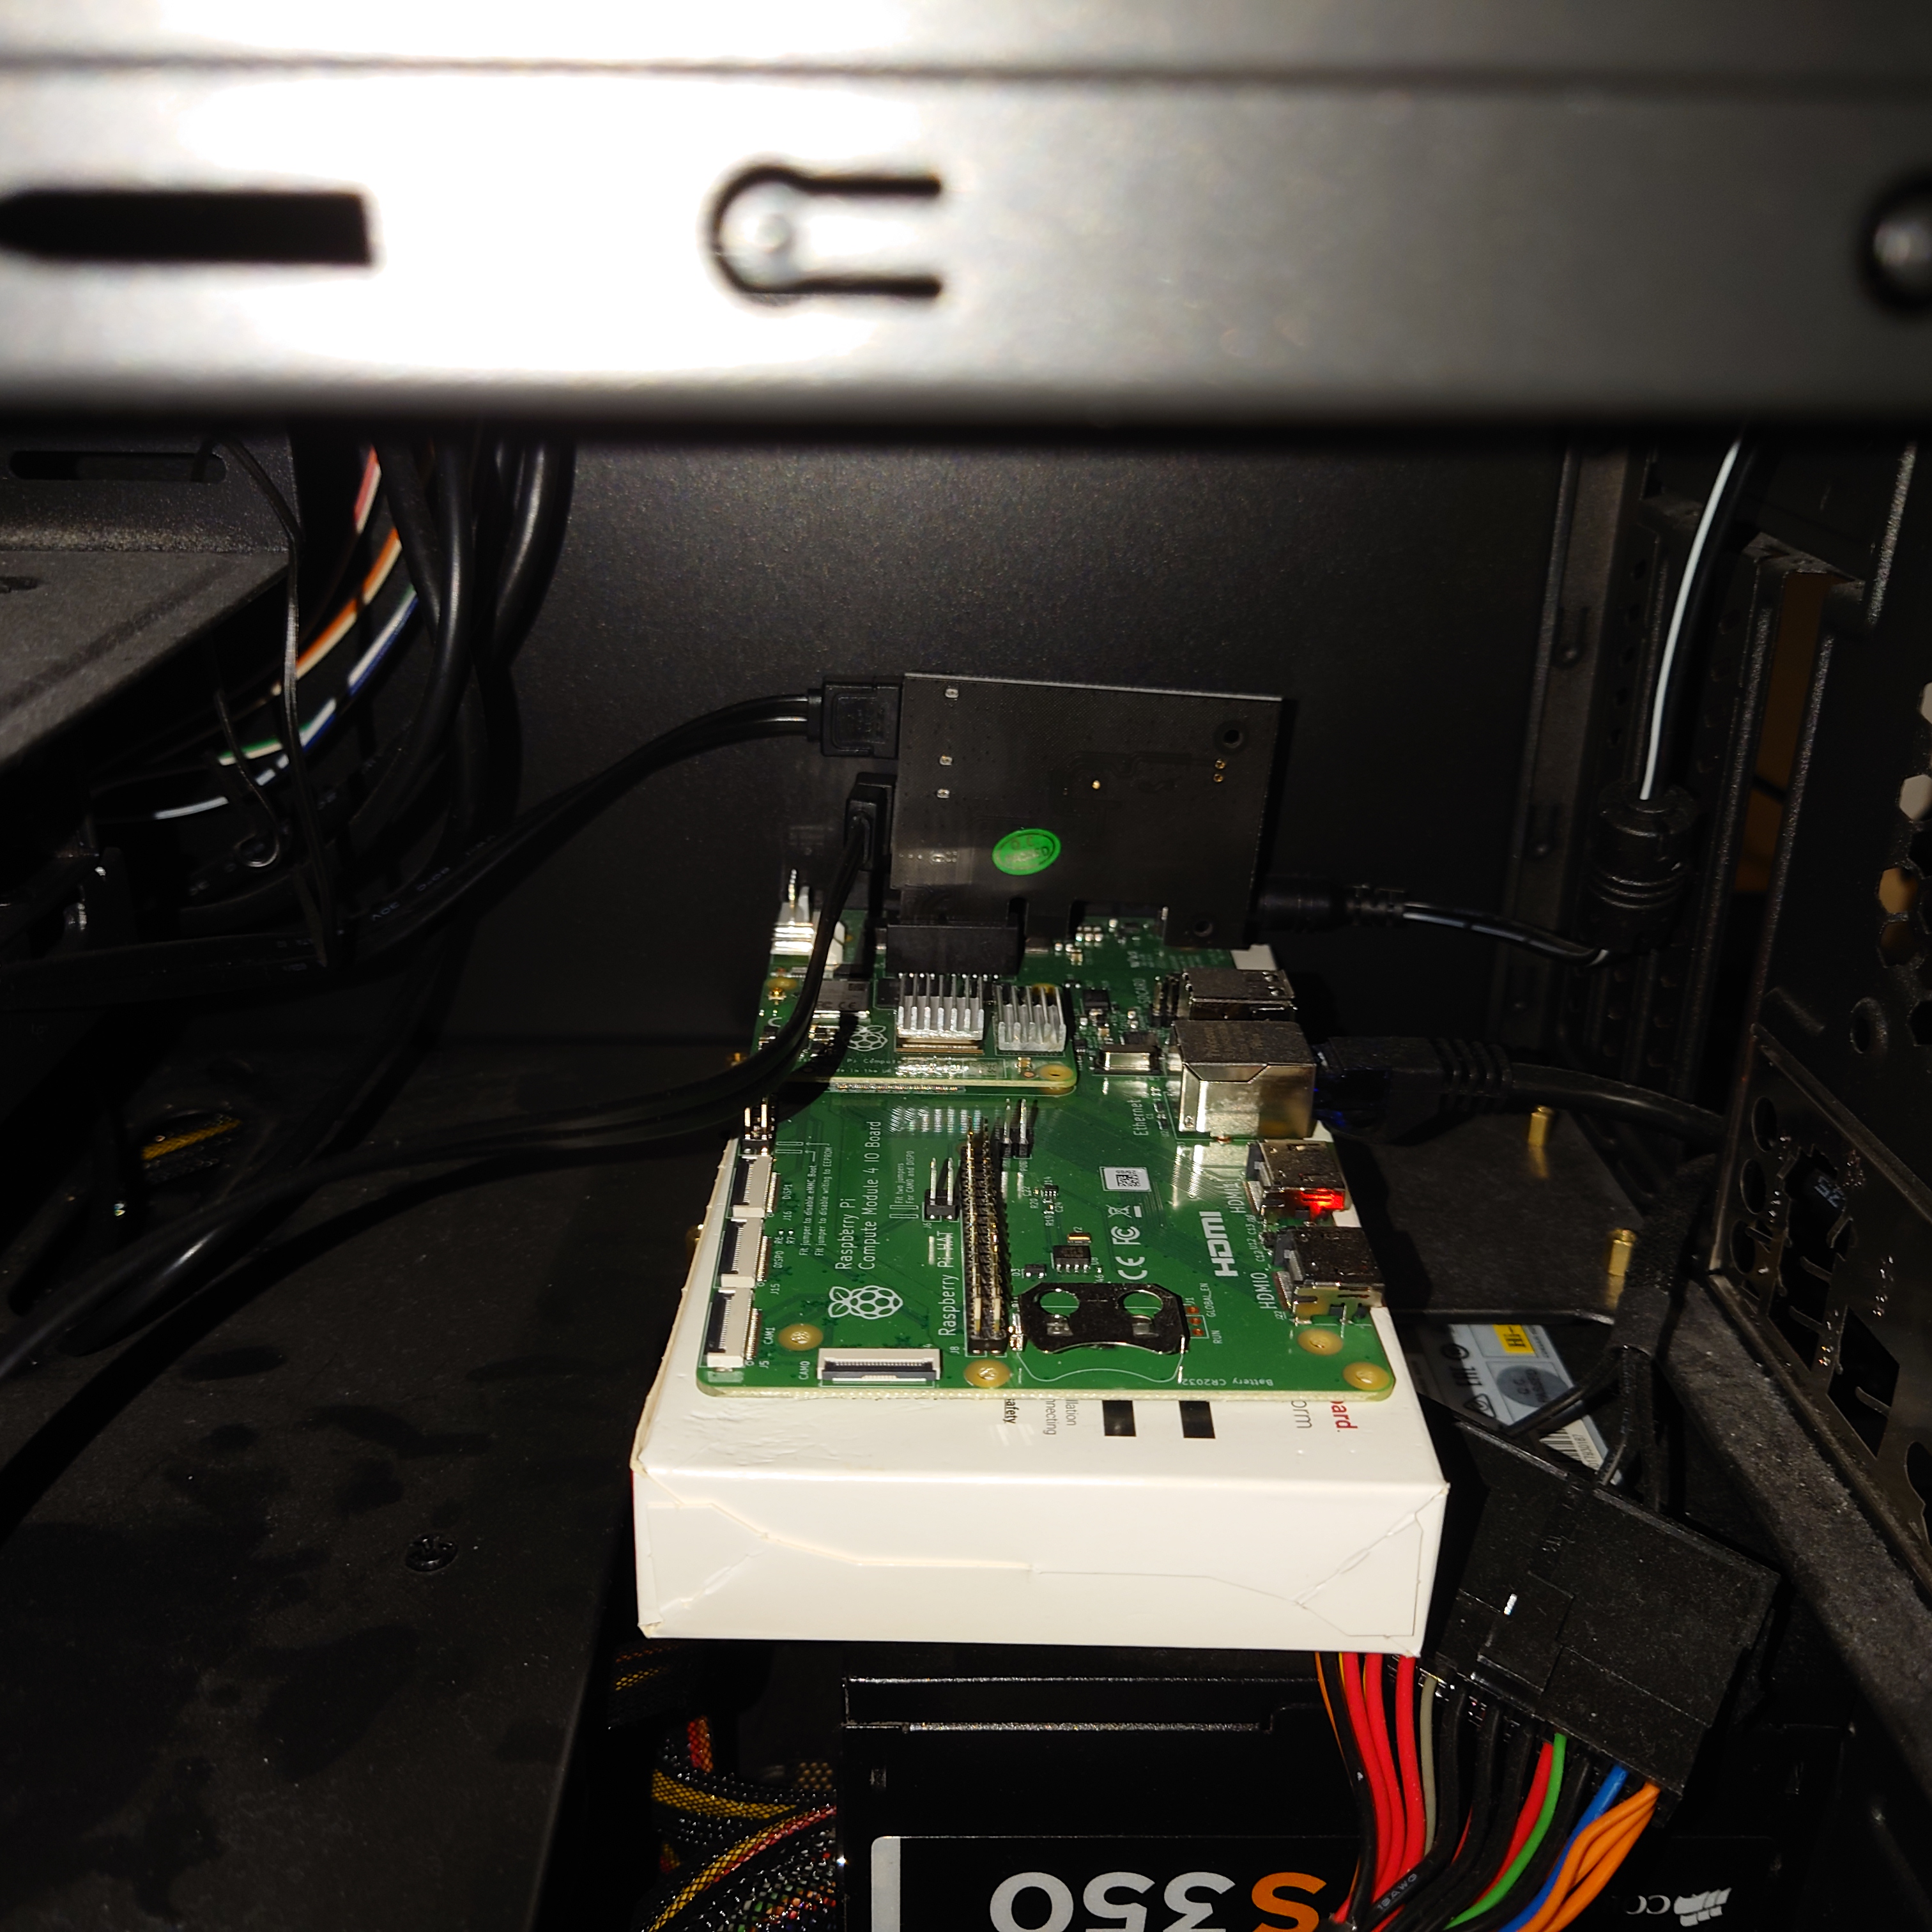
This Pi CM4 is living on a CM4 IO board. In a standard ATX enclosure. With an ATX power supply and a Seagate IronWolf 4 TB HDD. In the PCIe slot of the IO board is a PCIe to SATA card. The idea here is that, as mentioned above, I would like to switch to Pis as my Ceph cluster hosts, but I was dubious about whether it will actually work. Thus I set up this Frankenstein setup with a manual power switch bridging the right pins in the ATX 24 PIN power connector, because I don’t have a mainboard in the machine, but I needed a power supply to connect the disks to. The CM4 8GB is running Ubuntu server, with Ceph running baremetal. (Well, in Docker containers. More details in the next post on software) The verification has been pretty successful. I have not had any stability problems whatsoever, and speed also seems to be okayish. The one downside: The PCIe bus the CM4 makes available is only a single PCIe2 x1 lane. That means a maximum of 500 MByte per second in throughput, which means even a single good SSD could saturate the interface.
Next up: Command and Control.
As mentioned in the networking section, I initially wanted to use an APU2E4 for my firewall/router, but it was too slow with all the features I wanted. But the machine itself was still fine. It is passively cooled, has an internal 16GB SSD and a four core processor. A slow 4 core processor, but that’s fine. It now serves as my Command and Control server. When doing any work on the cluster, be it on Ceph or the Nomad cluster or Consul or Vault, I do it from this machine. The access keys for most things are stored here, many parts of my Homelab only accept control commands from this one machine in my network. The main reason I did it like this was to have a machine separate from my daily driver and my travel laptop, so that I would only have to store access keys and install all necessary tools on a single host. One thought on future work for this machine is that it has three NICs. So if I ever get around to introducing a segmented network with a management subnet, I can do so.
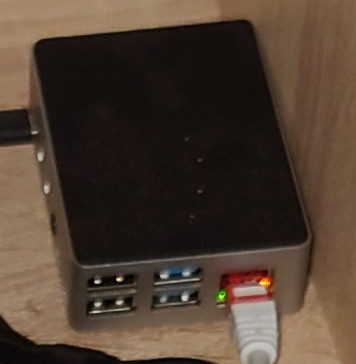
This particular machine does not have anything interesting, HW wise. It’s a Raspberry Pi 4 4GB. It is attached to this case from TerraPi. There’s also a Kingston 120 GB SSD connected with a USB to SATA adapter. The reason this machine is not netbooted is that it is supposed to be the second “foundational” machine, besides my firewall host. Hence, it cannot use any services from any other machine. It runs Ubuntu, like all other Pis, and also provides an NFS share mounted on all hosts, for easy and quick data sharing. It’s current main function is as an internal DNS server and a netboot server with DNSmasq.
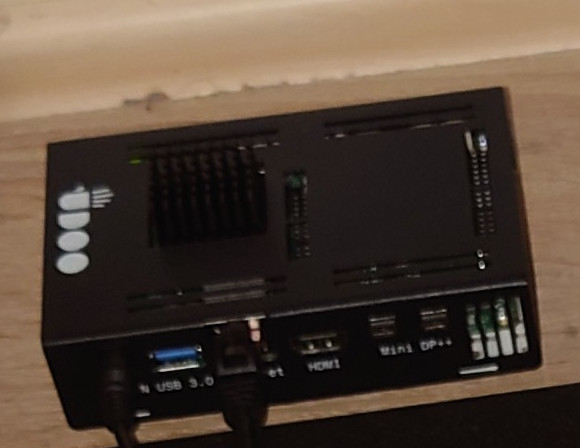
This is my token X86 host. It is an Udoo X86 II with an Intel Pentium N3710 with 2.56 GHz. It does not have any internal storage (it has eMMC, but I’m not using it), and is instead using netbooting. It was interesting to set up, as in contrast to the Raspberry Pi’s, it does netbooting a different, more common way with Syslinux. It is there to provide an X86 node when my cluster is entirely migrated to ARM based Pis. Just for those few remaining cases where apps I would like to run do not have an ARM version available.
This is a Raspberry Pi 4 8GB. It is configured as a cluster node in my Nomad cluster. It doesn’t have any local storage but is netbooted. It is there to test whether everything works with a Raspberry Pi as a cluster node. And I’m pretty happy to report: Yes it does! It runs Consul and Nomad and Docker perfectly fine. The performance is also pretty fine. For some reason, Nomad has taken to putting my PostgreSQL job on the Pi most of the time. But I was not seeing any problems whatsoever. Granted, it’s not all honey and sunshine. The Pi’s CPU is still a relatively low powered ARM one. So for a couple of services, I can actually tell when they got scheduled on the Pi instead of my main server. But that’s also fine for me.
The Future
In the future, I’m planning to migrate away from the single large x86 server and virtual machines over to a cluster of Pi CM4 modules. I’ve been pretty lucky in comparison to a lot of other members of the selfhosted community, as I was able to gather all 8 8GB Pi CM4 modules I need to fill two Turin Pi 2 cluster boards. I will write about this soon.
And that’s it. As I promised in the beginning, the next article will be an overview of the software stack I’m running, together with thoughts on Linux distros I have been running over the years and an in-depth explanation of my Vault/Consul/Nomad setup and the challenges of running those in a Homelab. I might also cop to the reason I’m not running Kubernetes. 😉